Frost + Flurries, Babywearing and Planning an Event on a Budget from an Industry Insider

Babywearing, Uncategorized

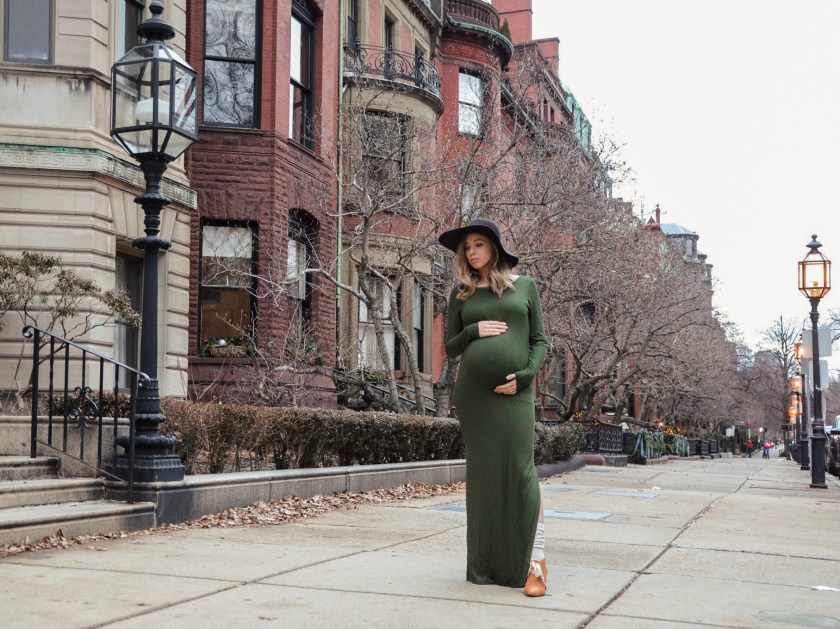
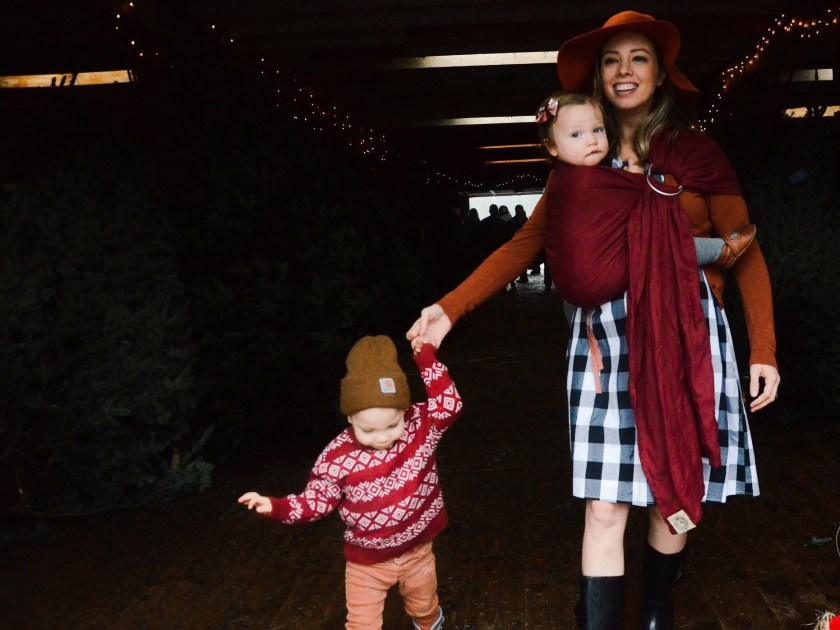
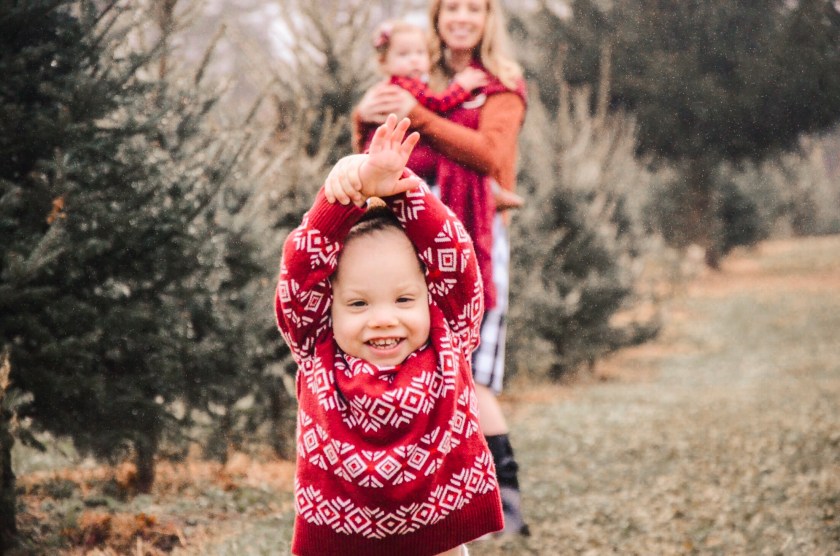
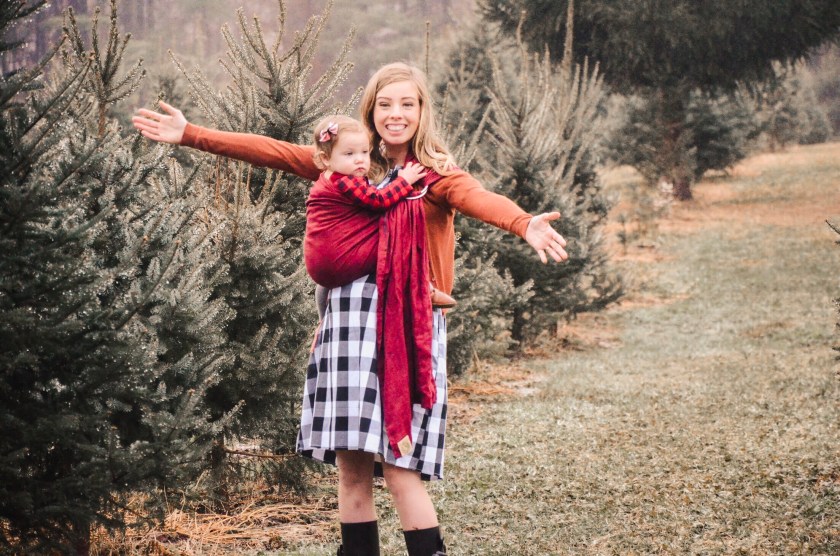
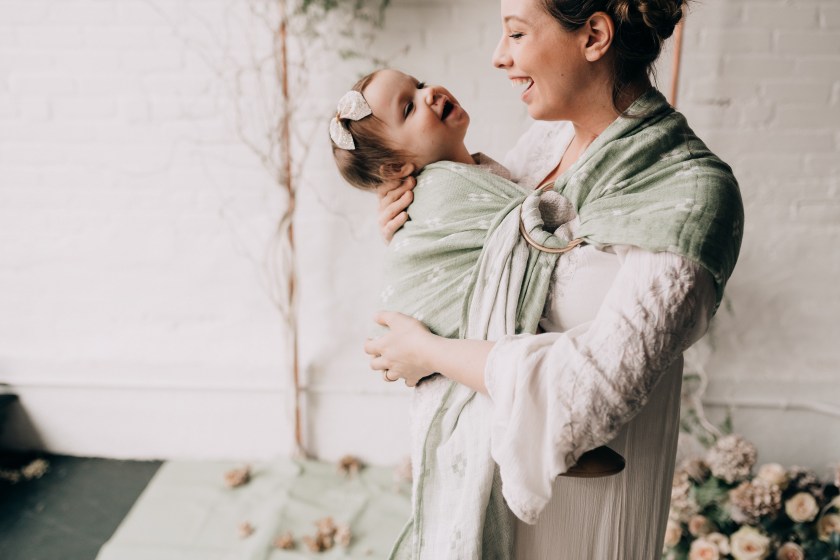
Lots of you know that I’ve been super involved in the babywearing community since I had Mathias. To give a little background information – I’m the oldest of seven kids and I have strong memories of my mom babywearing my siblings while I was growing up. She had one ring sling that was “super ugly” (her words) that she used for all of us (she likes to bring this up when she sees my sling stash). When I was pregnant with Mathias I knew I wanted a sling because I remember my mom being hands free, slinging and nursing and doing the dishes at the same time. Basically, being Wonder Woman.

In a nutshell: Instagram led me to find Wildbird Co. and I’ve been hooked on babywearing ever since.

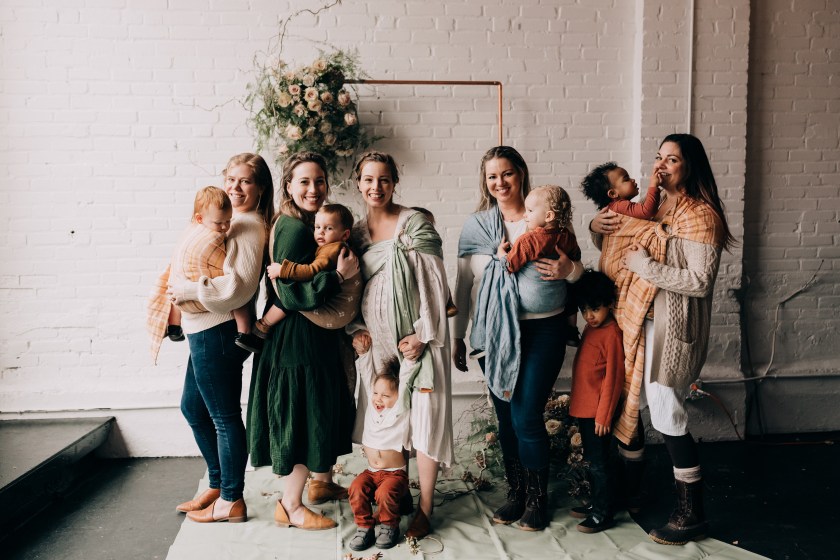
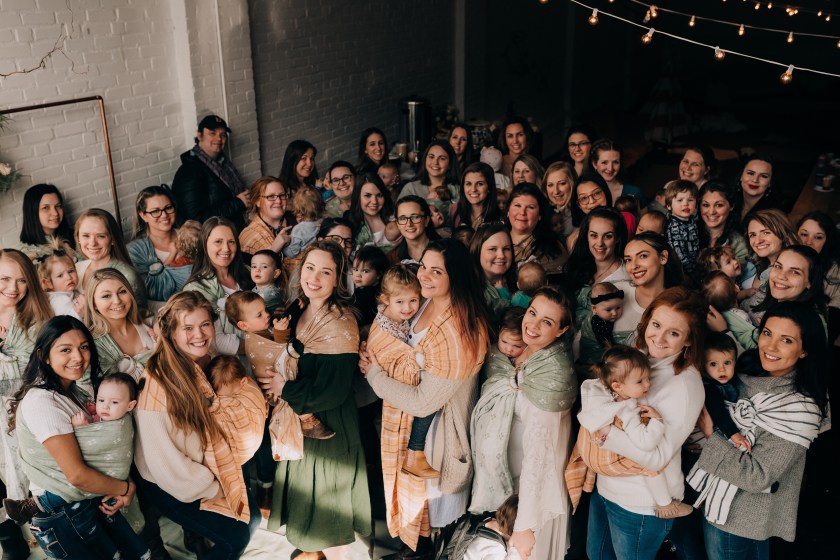
Since I’ve been involved with Wildbird, I’ve co-planned two events with my friend Kiera Joujoute (@mrsjoujoute on Instagram). Last year we planned a “One of Every Color” shoot of every sling that Wildbird had released until that point and this year when Wildbird reached out to Kiera about hosting their first “Flock” event outside of California, Kiera asked me if I’d co-host with her.

In case you’re wondering why Kiera asked me, it’s because I’ve been working in the events industry in Boston for 3 1/2 years! I’ve worked as a jack-of-all-trades at Warehouse XI in Somerville and have gotten to know (and love) a lot of people in the industry. Working for a venue means that I’ve learned so much about event planning even though that hasn’t been part of my job description (thank God, because it is a LOT OF WORK! Props to all of you event planners out there!).

Some facts:

The Flock event that Wildbird had asked her to host was simple in theory: throw an event where the attendees could pick up limited edition slings (purchased in advance).

The things we had to problem solve:

  • How many people should or could we comfortably host?
  • How large scale of an event would we plan – and how many vendors would need to be involved?
  • How would we pay for everything?

Regarding the number of people, Kiera and I decided right away that we didn’t want to have to offer tickets lottery style. The original event that Wildbird held in California was opened up to everyone in the Wildbird VIP group on Facebook (which has around 30k members) so everyone could enter but only a few would actually be selected to go (via lottery).

But here’s the thing – Kiera and I wanted to hold a community event for the women in the New England area. The fairest solution, from how we looked at it, was to open it up to our local babywearing Wildbird off-shoot group which is composed of women from the New England region. We wouldn’t offer a plus-one option until after we knew we could hold more than just these mamas and their babies in the space.

The maximum capacity at Warehouse XI is 150 but with our setup we would really only have space for 100-115. Which, FYI, is a LOT of people.

We were not given a budget from Wildbird. They didn’t ask us to go all out and throw the event we decided to throw, but throwing a big event in February in Boston meant that we needed an indoor space, we needed to decorate, feed the attendees, etc…

We added $10 per adult ticket, $7 per child (over 12 months) and $10 per plus one, because we knew we would have to at least pay for the following:

  • Venue Fee
  • Food + Beverage
  • Decor

It did not add up to a lot, considering. But we wanted to make it affordable when the slings themselves already cost $90 or $120.

Here’s the breakdown of our budget.

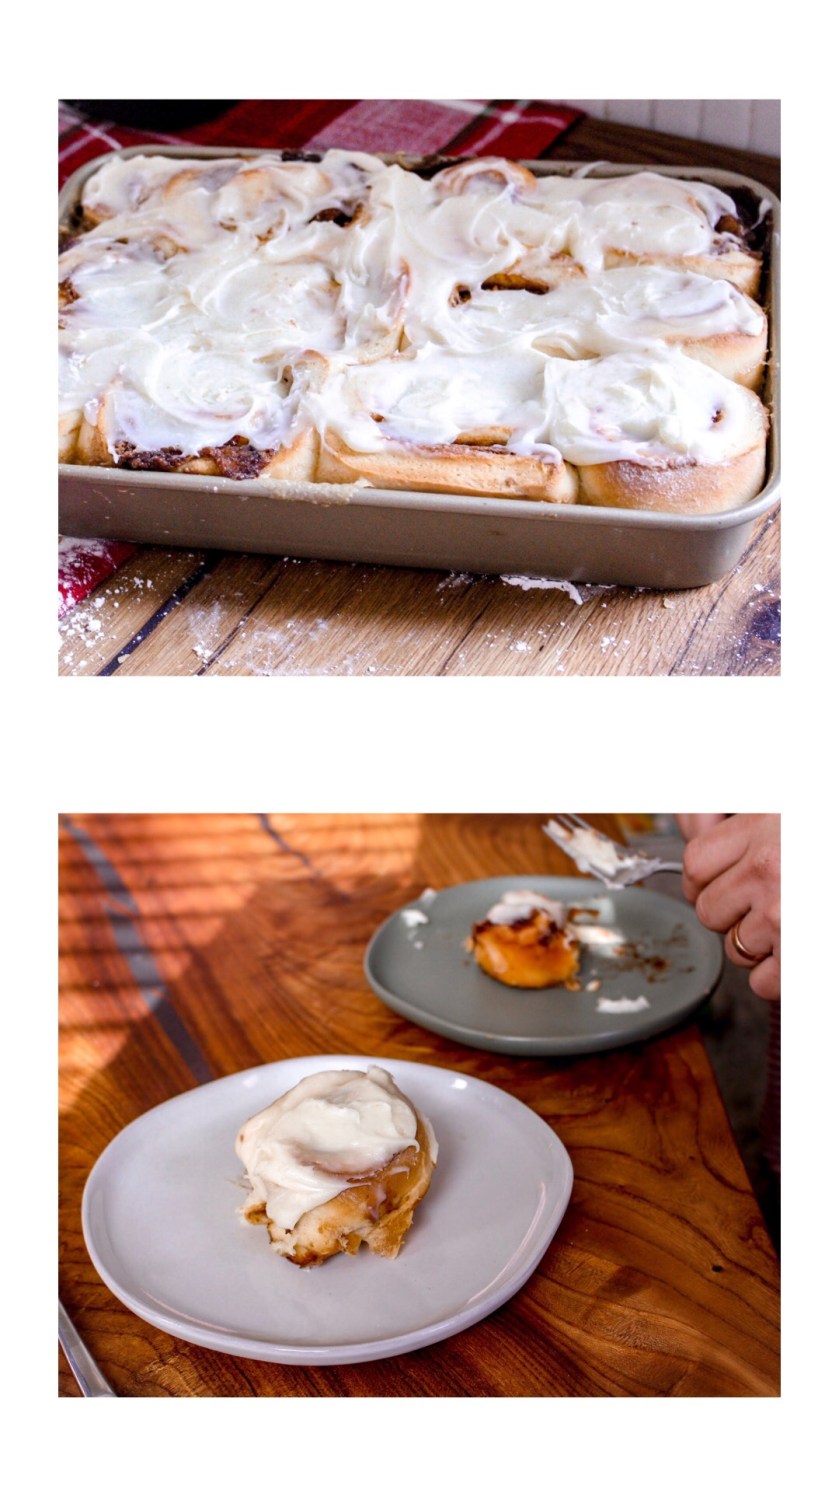
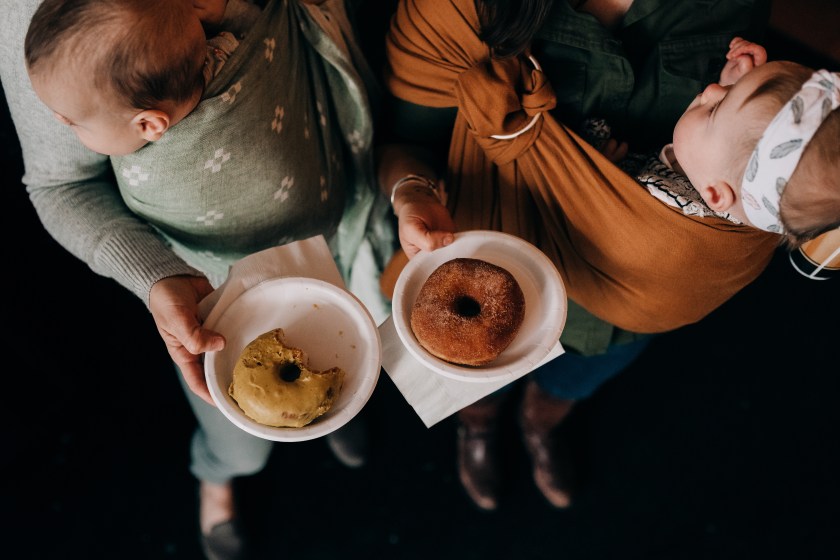
Half went to food + beverages. We decided on donuts + hot chocolate because it felt appropriate for a winter event (Kiera came up with the name “Frost + Flurries”, which was perfect after the California event which had been titled “Salt + Sand”). Could we have ordered Dunkin Donuts and saved money? Yes. Does anyone like DD donuts? …. I don’t. Maybe I’m not a real Bostonian yet. But if I have the choice to order from Dunkin or Union Square Donuts, I’m picking the fancy, fluffy, fresh donuts. We got a 10% discount because they’re down the street from the warehouse and we’ve worked with them before, but they were not cheap.

#worthit

Kiera took on the task of gathering together all the hot chocolate supplies; everything was purchased at Costco or Target. The platters/decor for the bar mostly came from my house.

Let’s talk about the venue + vendors.

Because I work at Warehouse XI (and have worked for my boss for a long time, built the website, did all of her branding, etc…) we only had to pay a utilities fee. This was extremely generous of her because typically an off-peak 8 hour Saturday rental is $3,000.

Obviously, finding a free space is ideal. If you live in a region with beautiful weather, take advantage of that! That’s what Wildbird did for their first event. However, if that isn’t an option for you, here are a few tips:

  1. Venue fees are always lower during the week. Usually that means Monday – Thursday. Saturdays are typically the most expensive day of the week, with Friday and Sunday falling right behind, if they aren’t all the same price (weekend rate vs. weekday). What that means is that venues are more likely to have flexibility with pricing during the week.
  1. Do your research! And I mean looking across multiple platforms – not just google and yelp. Yelp won’t usually have bigger event spaces; Google ranks via SEO and depending on the website and how much traffic they’ve gotten, if they are using AdWords, etc, great venues might not show up until three or four or eight pages into google. Wedding Venues in particular compete with big directories such as The Knot, Wedding Wire, The Venue Report etc. when it comes to google rankings and it makes it hard for local vendors to always land on the first page! The Venue Report is probably my favorite place to look and usually will have links to new places too. Instagram is also a great place to look; at least check to see if the venue has an IG and it’ll give you an idea of their space and what they do there!
  2. Send out inquiries EVERYWHERE, even if you don’t think they will be interested!

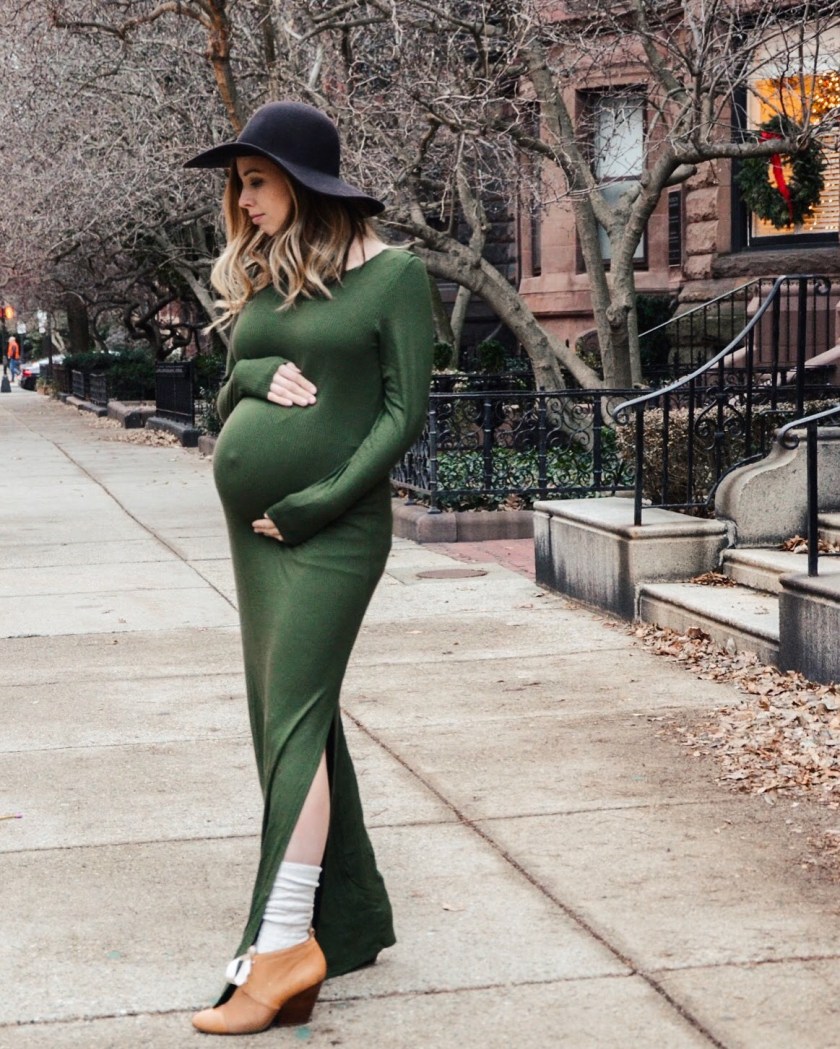
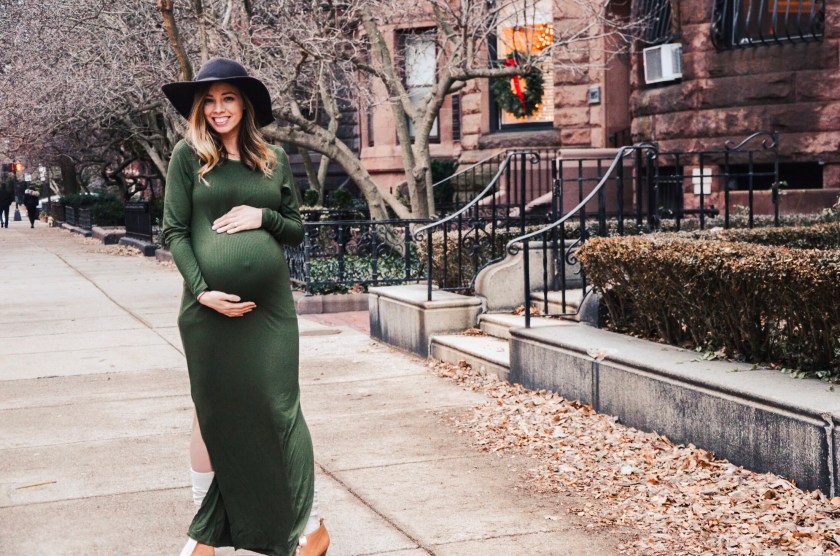
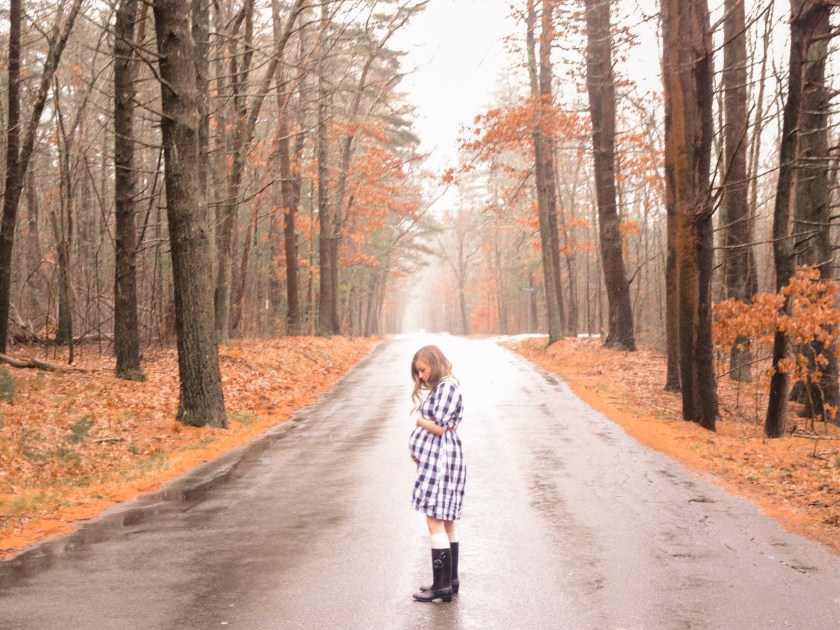
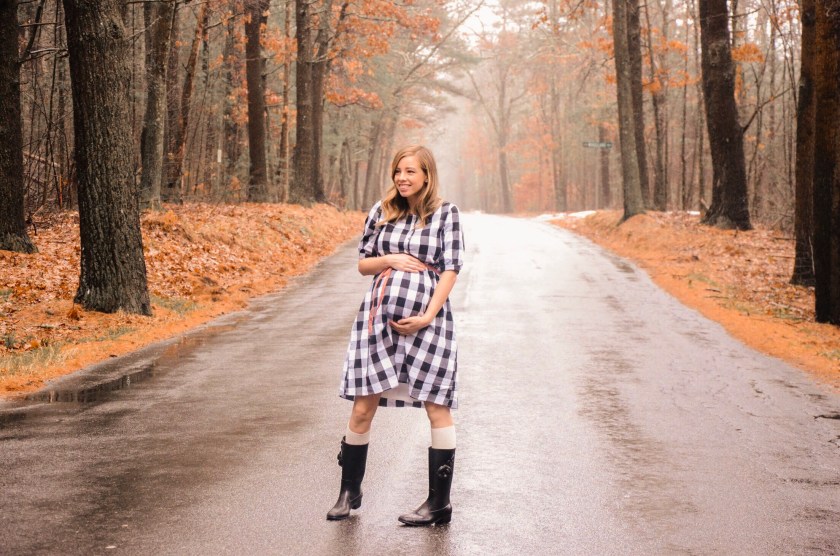
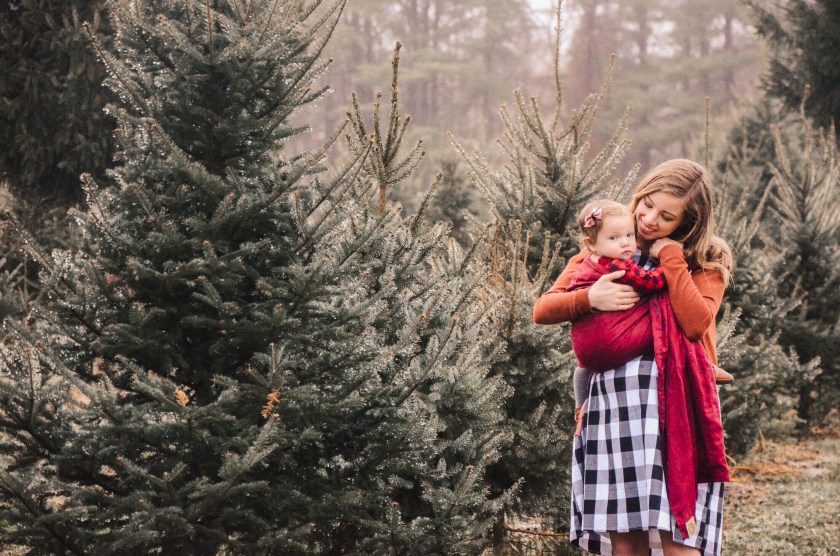
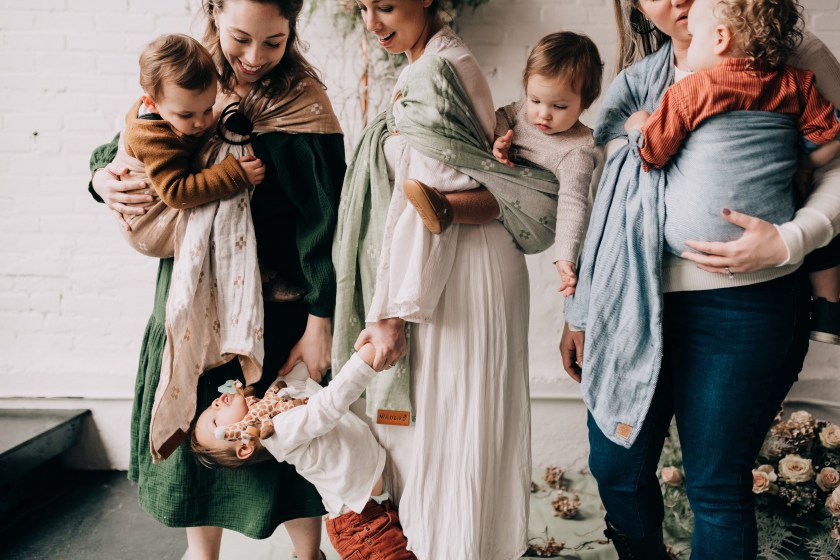
Photo Credit: Abigail Jean Photography

  • This brings me to my next point: how to approach vendors about your event.
  • If you’re active on Instagram, whether as an influencer or a “micro-influencer” or what have you, chances are you have approached brands via DM or email about collaborations. That’s what successfully planning an event on a budget comes down to.
  • Obviously I had an advantage here of knowing vendors through my venue – but I still struggled to find vendors who were available on short notice or vendors who considered it worth their time. If your event is during wedding season (May – October), that will limit your options because the industry is busy and people don’t usually even have the time – which is why styled shoots are often shot during our off-season (December – April).
  • This event is, in a lot of ways, a styled shoot for the vendors involved. In the events industry, a bunch of vendors will collaborate on a styled shoot with a theme (let’s say, “Modern Industrial Styled Shoot”) in order to create content for their website, social media, etc. Everyone offers up their talents for free (sometimes a venue will have to charge a small utilities fee). This is what your goal is: to convince the vendors that this is an opportunity for content creation where they can receive social media exposure, from you, and the other vendors (and in this case – Wildbird).
  • My other suggestion is to cast a wide net. Ask a LOT of people and don’t feel bad if you get rejected. I also suggest asking vendors who are newer in their industries and have a smaller following on Instagram. Those are the vendors who need content and will likely work just covering the cost of product.
  • Sidebar – there’s always the option of finding a vendor that’s an “extra” fee that your guests can pay out of pocket if they want to. Maybe there’s a local macaron cart or a nail artist that you’d love to bring on but you can’t pay for them. That’s ok! See if there’s enough interest from your attendees. That’s how I approached Ashley from Abode Beauty Bar – I asked her if she’d be interested in offering a braid bar at the event for any mamas/toddlers and she said she’d charge $10/adult and $5/child. I brought it to the group and we had so many people interested that we had to start braids early!
  • Finally – ask vendors who you can connect to on a personal level or who can connect to your event. That means if you’re doing a babywearing event, ask vendors who are also mothers! Connecting on a personal level is super important because it elevates the worth of the project from just a photo op to something more.
  • That’s really what motivated me to make this event bigger and better than what was asked of us: it was personal. Babywearing is a huge part of my journey as a mother – brands aside – and finding a community of other mothers has been super important in my life.
  • When I finished school I realized that I didn’t know where I would meet people. Most people make work friends, but I was working as an interior designer’s assistant in a small firm. Some of my friends stayed in Brooklyn after we graduated, but it was still hard to stay in touch. When I moved to Boston we had almost no friends here (Lucas did, but I didn’t) and once again I found myself working as an assistant and had no “work friends” in sight. And then I became a mother and my friends from college were all still single or working or nowhere near motherhood, so I didn’t even have those friends to talk to or vent with or ask questions.
  • And so, the memory of my mother babywearing led me to some research on Instagram and that led me to a small group of 5,000 or so women on Facebook, which would virtually change my life…

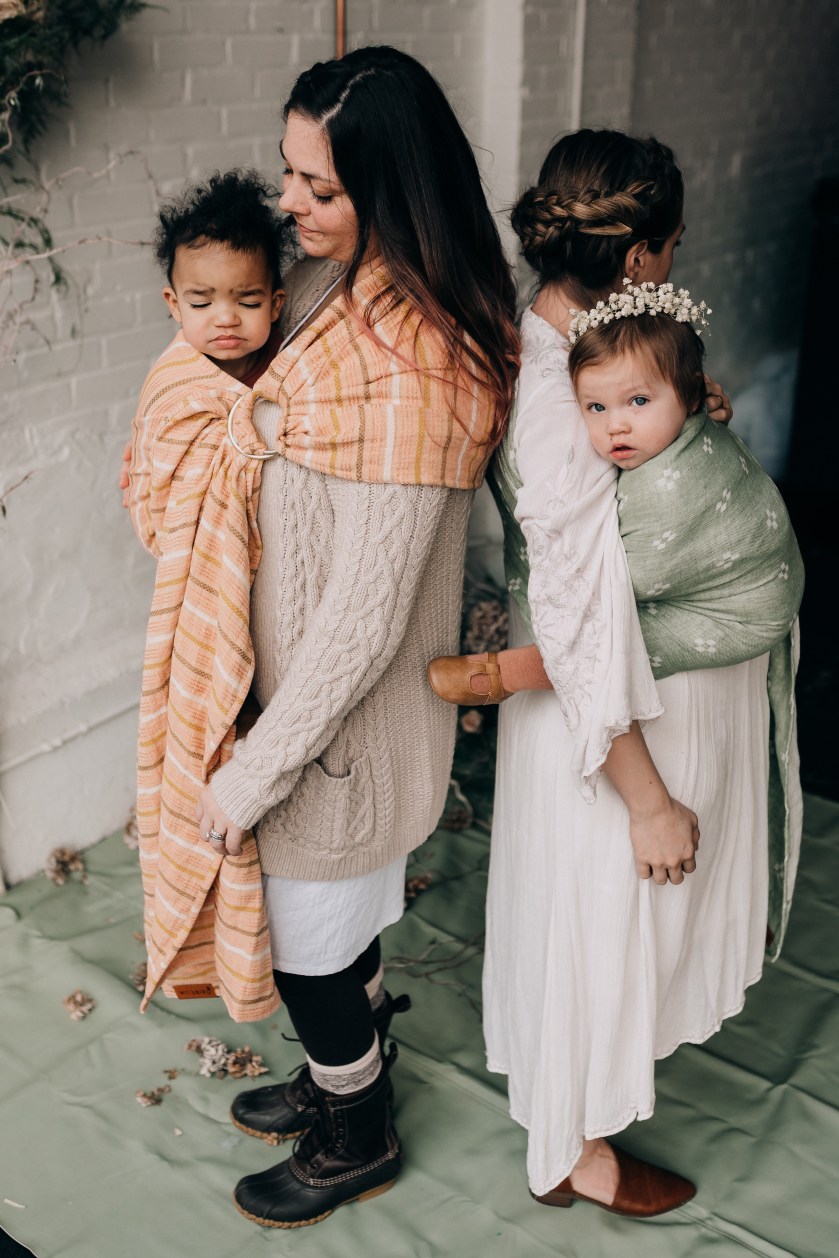
    So doing this event as a celebration of motherhood, as a thank you to the women who have supported me in dark days, who have sent me unexpected pick-me-ups and comforted me when I received difficult news, as a reminder that motherhood is HARD but BEAUTIFUL – that mattered to me. I wanted to create something that represented who I am, who we are…what we represent, why a piece of fabric and aluminum rings matters…

    I hope that we did a good job – that everyone enjoyed the event and that all of our hard work paid off. I was really happy with how things turned out, even though I burned myself out and came home and dry heaved for five minutes because I was 36 weeks pregnant and spent all day on my feet, didn’t drink enough water and barely ate more than a donut all day – honest motherhood, right?

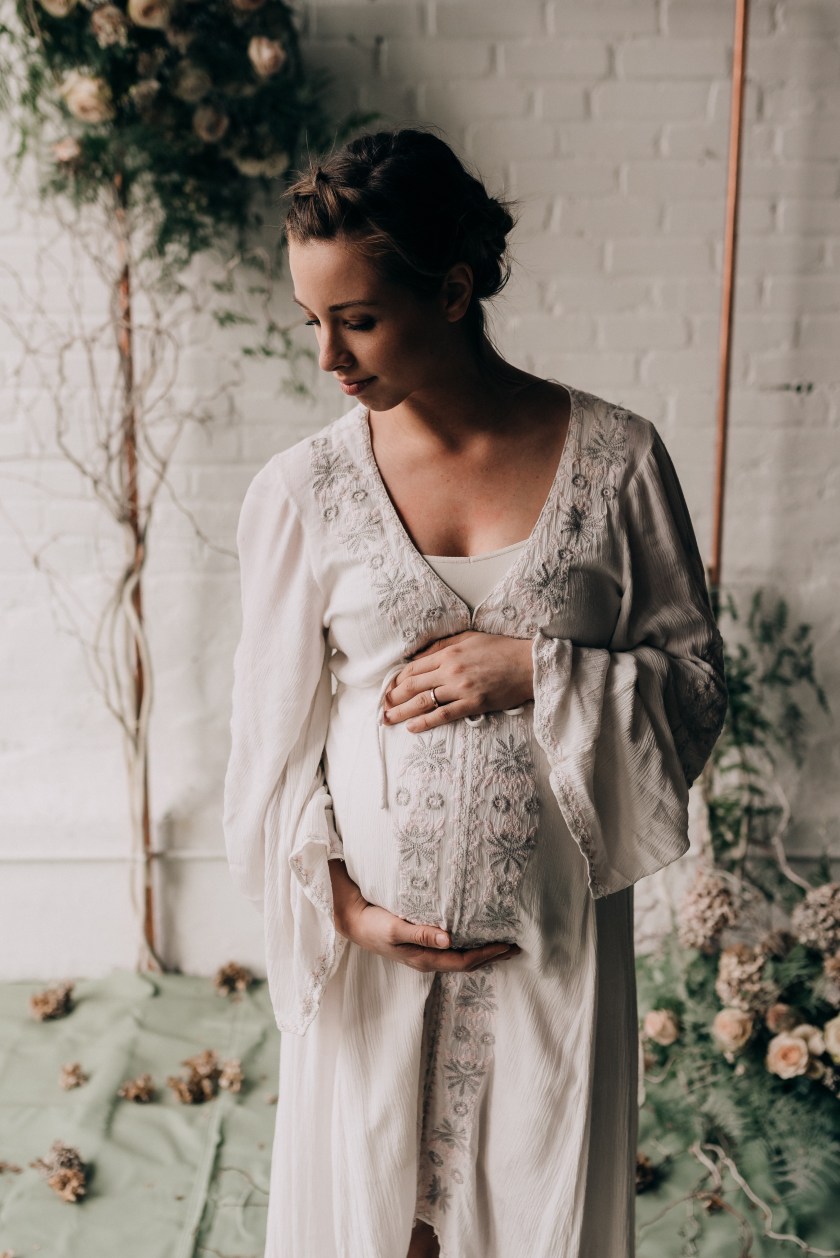
    Would I do it again? Not 9 months pregnant. But I would under the right circumstances. Until then, I’ll settle for my small group meetups at breweries (you heard me) and coffee shops and anywhere we can get away with bringing a small army of babies + toddlers.

    Venue: Warehouse XIPhotographer: Allison Wolf Photography

    Florals: Hafsa & Co.

    Lovebird Installation: My Sunday Afternoon

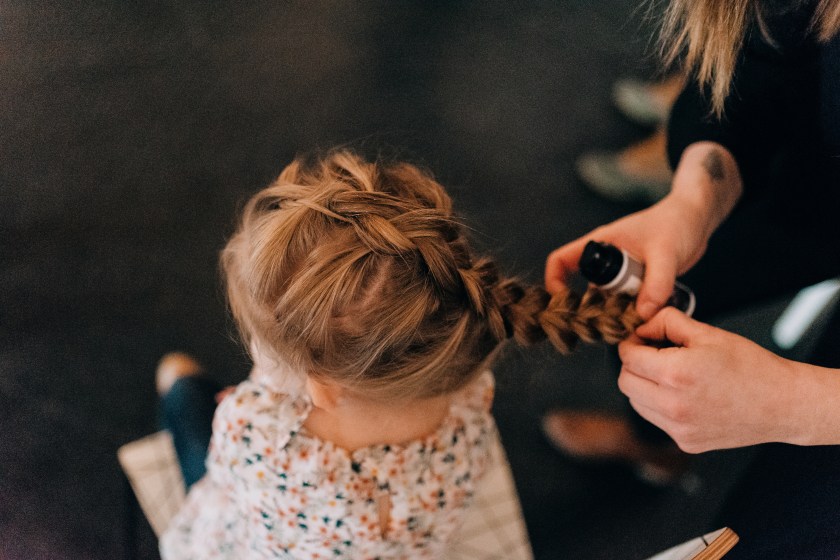
    Braid Bar: Abode Beauty Bar

    Tables: Lighthouse Woodworks

    Donuts: Union Square Donuts

    25 Days of Cookies Roundup

    Baking

    Christmas week really got to me – besides a very busy schedule the week before for Mathias, Lucas also was very busy finishing up everything at the shop and then we hosted! So I ended up slacking. I’m making up for it by posting my favorites here.

    First of all – I made so many cookies and didn’t even hit all of the cookies I wanted to make!

    From top to bottom:

    1. Rugelach

    My favorite of this bunch, and make my top 5 of the challenge. They’re flaky and not overly sweet, and look stunning and much harder than they are.

    2. Rosemary Olive Oil Chocolate Chunk Shortbread

    These are from Smitten Kitchen Everyday and I don’t think they’re online, but they are super simple, vegan and unexpected. Rosemary and dark chocolate, paired with a olive oil, are sophisticated while still remaining in the realm of a sweet rather than savory cookie. Worth trying to see if they’re your style (I love them, Liv loves them, Lucas does not).

    3. Whiskey Pecan Dark Chocolate Chip Cookies (slightly adapted – see my original post!)

    I liked but did not love these in comparison to other chocolate chip or pecan related cookies. I would make again, for the right occasion.

    4. Chocolate Pecan Cookies

    These are from The Dominique Ansel Cookbook so unfortunately I can’t link the recipe, but these were the only all chocolate cookie I made and also really one of my faves of the whole bunch. 10/10.

    5. Slice and Bake Peanut Butter Cookies

    If you’re a fan of Girl Scout Tagalongs, you will love these. I made the comparison to Lucas and he said yeah, but these are better.

    They’re really that good. The cookies are very simple to make but they’re multi-step, so you need a little bit of time. I made half the batch and put the other half of the dough in my freezer which is a win in my book. Will definitely make again.

    6. Babywearing Sugar Cookies

    The cookie recipe is from Sally’s Baking Addiction and was pretty much perfect, for a sugar cookie. I didn’t use her icing recipe because it required meringue powder (which I didn’t have). I doubled it and made a ton of cookies which I gifted and also ate. If you need a classic cutout cookie recipe, use this one. Also her tip here is to roll out the cookie dough between two pieces of parchment paper and then refrigerate for 1-2 hours; so you get your rolling out of the way. I froze mine for time purposes for 45 minutes and it was plenty, and then put my cut cookies in the freezer between batches. I did this for my gingerbread too and think it was an amazing tip since none of my cookies spread!

    7. Chewy Chai Masala Snickerdoodles

    These are the best Snickerdoodles I’ve ever made, and you should make them too. They’re soft and chewy, and the depth of flavor from the other spices makes these memorable. And they don’t need chill time, which is always a perk in my book. I’m never making a different recipe.

    8. Red Velvet Whoopie Pies

    This recipe from SBA was good but needs some edits. I would make again, but add baking powder.

    9. Vegan Green Monstah Whoopie Pies

    My vegan adaptation of the Red Velvet Whoopie Pies, plus other changes. I liked these better than the non-vegan ones!

    10. Chewy Molasses Cookies

    These were soft and chewy but honestly they didn’t spread, and so failed the molasses cookie test. Would suggest a different recipe, or different molasses (I used Blackstrap because that’s what I had on hand, but it called for Grandma’s, but that should affect the flavor profile rather than their spreading).

    11. Brown Butter Chocolate Chip Cookies

    I think the fault is mine here; the recipe calls for brown butter and softened butter, but I walked away from my brown butter for too long and it solidified and I expect that that’s why I didn’t get a chewy cookie. These ranked #2 on The Pancake Princess Chocolate Chip Cookie Bake-Off and my cookies didn’t look like hers or Joy the Baker’s, so I know I made the mistake here. Would definitely try again.

    12. Cream Cheese Stuffed Red Velvet Cookies

    These were AMAZING and one of my favorites from this challenge. They are time consuming, but the finished product is a perfectly chewy red velvet cookie filled with a tangy cream cheese surprise and dang they are good. 10/10 highly recommend to impress your friends and family, but you need to plan this well since you need fridge/freezer time.

    13. Peanut Butter Cookies

    These are from Alton Brown’s EveryDay Cook, and are extremely simple: no mixer, one bowl, dairy free and gluten free. I’ve made these before and I’ll make them again; they’re a good recipe to make with kids!

    14. These were supposed to be Chocolate Snow Caps, from the Mast Brothers Cookbook. Total fail.

    15. Vegan Lemon Cookies

    I slightly adapted these, but I’m sure they are good both ways! They were soft, lemony and cakey and stayed soft for almost a week! Liv loved them! My slight edits are here.

    16. Bakery-Style Butter Cookies

    From Smitten Kitchen Everyday, these are actually super easy – just multi-step. And they’re adaptable in the sense that you don’t have to do sandwich cookies, but could pipe them into a variety of other bakery-style shapes with different fillings.

    17. Lace Cookies

    Sally calls these “easy” but I screwed up MAJORLY the first time I made the batter and it turned into a solid rock. The trick is not to overmix on the stove. Hoping to get around to showing you what these should and should definitely not look like step-by-step.

    18. Pignoli Cookies

    These are a favorite of mine and Lucas, but I made my cookies too big so we only got 10 out of this recipe instead of 14. I would also suggest more pine nuts – it calls for one cup but I ran out maybe 7 cookies in. BUT these are pretty dang bakery perfect: chewy and almond-y in a way that only almond paste can aid a cookie.

    19. Gingerbread Brownstone!

    I’d love to share more on this but didn’t take nearly enough pictures. I based this off of A Cozy Kitchen’s Cozy Gingerbread House, using a different royal icing recipe (again, no merengue powder). It wasn’t perfect but considering I freehanded it and baked/decorated it in one night, I’m not too displeased. Plus she posted it in her stories, so that redeems the architectural sloppiness.

    20. Ninjabread Men

    These are vegan and I did slightly adapt the recipe when baking (I used egg replacer instead of a flax egg, brown sugar instead of coconut sugar, and added 1/2 tsp of baking powder) but I liked these better than the gingerbread I used for the brownstone. I also rolled these out via Sally’s Sugar Cookie method and had no spreading!

    21. Vegan Soft Baked Sugar Cookies

    These were a simple, no-mixer, no-fancy-vegan-ingredients recipe and a pretty solid winner for Livia. I was skeptical at first (she uses oil, not a vegan butter replacement) but was really pleasantly surprised about how good these are. I would add an extra tsp of vanilla or a hit of almond extract to up the flavor but for kids this is kind of perfect.

    22. Christmas Chocolate Chip Cookies

    I LOVED these. I got some brown butter redemption (these came out exactly like the recipe) and only used dark chocolate m&ms (no chocolate chips). Kind of want to make these all the time and deeply regret not freezing any dough.

    23. Classic Madeleines

    I always thought Madeleines were hard; turns out they’re super easy and everyone should make them. They’re perfect with an espresso and an easy way to impress guests. 10/10.

    24. Seven Layer Cookies

    Also known as Rainbow Cookies, these are an Italian-American bakery classic that I make for Christmas every year. They aren’t hard but take time, but are so much better than any store bought (or frankly, bakery bought) ones. Plus they keep in the freezer for a long time, so you can enjoy them past the Christmas season (I think this year we finished ours in June….). These are my favorite on the whole list and a necessary bake for Christmas.

    25. Cannolis

    So I bought the shells in Little Italy and made the recipe up because I couldn’t find a recipe that didn’t include heavy cream or mascarpone which aren’t traditional Italian ingredients for this pastry! When I have time I’ll upload it!

    BONUS: Christmas Morning Cinnamon Rolls

    I follow The Pancake Princess pretty religiously and she did a cinnamon roll bake-off that had me curious. These ranked #2, but were a morning-of recipe. Definitely the best I’ve ever made (Lucas agreed) and strongly suggest that you try them. The frosting was a little on the sweet side (according to Lucas) but that’s an easy fix (less sugar!). Whipping the butter + cinnamon sugar together for the filling is a game changer.

    Boston’s Back Bay + Holiday Style

    Adventures, Cities

    On Sunday we took Mathias and Livia to the Prudential Center Mall in the Back Bay area of Boston to see Santa…well, the line was about 50 people deep and my kids probably wouldn’t have made it halfway through the line without one of them having a meltdown. So instead we ended up taking a stroll around the neighborhood to enjoy the holiday lights and decor.

    If you’re not familiar with Boston, Back Bay is an affluent neighborhood downtown best known for its gorgeous rows of brownstones and high-end shopping – kind of like if New York City’s Upper East Side had a baby with 5th Avenue. I have always been drawn to this neighborhood because the brownstones remind me of home. They’re a huge part of the architecture in Brooklyn and I think every city girl’s dream is to live in one. It isn’t necessarily on the standard tourist’s bucket list, but I always suggest it to friends who visit from out of town. This area is magical in a way that will make you fall in love with this city and its history.

    I always struggle with being both comfortable and fashionable when I’m pregnant and for the past three pregnancies I’ve always turned to PinkBlush Maternity.

    The thing with being a mother of soon to be three under three is that we are ALWAYS on the go. And if I’m going to be hauling around two toddlers with a huge belly, I’m looking for something that is going to be flattering and transitional without me having to do anything other than changing my accessories. I wore this dress all day – to the mall, to Pizzeria Uno, walking around Back Bay – and hat and a change of shoes brought me from day to night look with no effort. I plan on wearing this for at least one holiday event this season and have a few others I can’t wait to wear! You can find their dresses here.

    Oh, and a Back Bay resident who was walking his pug told me I looked fabulous, so that made me feel pretty good after failing to bring my kids to meet Santa.

    You can find my dress here and right now there is a sale for 20% off! They ship super fast and you definitely have time to get something before the holidays.

    This is a sponsored post.

    Vegan Green Monstah Whoopie Pies

    Baking

    First of all, I’d like to thank the academy…

    Actually I’d like to thank my extremely protective mother who refused to allow any dairy in our house for 8 years, and forced me to learn how to bake dairy free against my wishes. The first time I got to bake with real butter again was only after I got married.

    My youngest brother is severely allergic to dairy (I’m talking, can’t walk into an italian restaurant without wheezing and getting a runny nose) and we had quite a few scares when he was a baby because anaphylactic reactions are life threatening. So we went dairy free. And at 13, I already had a passion for baking (I think I wanted to be a pastry chef around age 7 or 8) and it was like…the end of the world. But I learned, slowly, and good thing I did because both of my children have had dairy intolerances as infants and Liv still hasn’t outgrown hers.

    A decade ago, vegan and dairy free recipes were not trendy or, honestly, available. I remember when Babycakes opened in NYC and my mom went there so excited because their desserts were allergy friendly and it was a safe place to buy something for my brother. But it was expensive. So that was a rare occurrence and instead we all learned that baking dairy free was not only possible, but could be just as good (or better) than desserts with dairy!

    I’ve mentioned before how things have changed so much since then and how many more options we have, but I am so grateful that vegan food has entered mainstream culture. And because of my mom’s drive to protect my brother at all costs, I learned how to adapt recipes and for them to not be total failures (usually).

    So! I made Red Velvet Whoopie Pies on Wednesday as part of our cookie challenge and they were very, very dairy filled. They tasted great – everything you would want from Red Velvet Cake, they were moist and rich and the cream cheese frosting was perfectly thick and a happy balance of not too sweet, not too tart. They didn’t rise as much as I would have liked and I brought that up to the other ladies in this challenge with me and they offered some suggestions.

    However, Livia has learned what cookies are during this time and was ~furious~ that I wouldn’t give her any. So I decided to adapt the recipe, not just to be dairy free but totally vegan, because why not go all in?

    I was elated because these were even better than the original!

    Look at that rise! 🙌🏼

    I am always hesitant about substitutes and the original recipe called for buttermilk. When you want to make a vegan milk “buttermilk” you add 1 tsp of vinegar to 1 cup of alternative milk and let it sit for 5 minutes. This was my first time using Bolthouse Farms to make buttermilk and it worked out really well!

    They are “velvet” whoopie pies and I went with green to distinguish them from the red non-vegan ones I made the day before. And in honor of Boston – I’m calling these Green Monstah Whoopie Pies.

    If you know, you know.

    Needless to say, Liv was a fan.

    Green Monstah Whoopie Pies

    Veganized / Adapted from Sally’s Baking Addiction.

    Ingredients:

    • 2 cups (250g) all-purpose flour (spoon & leveled)
    • 3 Tablespoons (15g) unsweetened natural cocoa powder
    • 1 teaspoon baking soda
    • 1 teaspoon baking powder
    • 1/2 teaspoon salt
    • 1/2 cup (115g) unsalted vegan butter, softened to room temperature. I used Fleishmann’s.
    • 1 cup (200g) packed light brown sugar
    • 1 egg substitute – I used Namaste Raw Foods Egg Replacer but have no preference
    • 2/3 cup (160ml) “buttermilk”, room temperature; mix 1 cup of bolthouse farms unsweetened plant milk with 1 tsp of apple cider or white vinegar. Let sit for 5 minutes and then measure 2/3 out. It will be clumpy – this is normal! *if you don’t want to use Bolthouse Farms, here are my suggestions: unsweetened almond milk or unsweetened coconut milk (not canned!). Other milk alternatives are usually too thin and will thin out your batter!
    • 2 teaspoons pure vanilla extract
    • ~ 1 tsp gel green food coloring, I used a little more

    Cream Cheese Filling:

    • 6 ounces (170g) vegan cream cheese substitute, softened to room temperature. I used Wayfare (it is coconut based) because I like their flavor best
    • 1/4 cup (1/2 stick; 60g) unsalted vegan butter substitute, softened to room temperature
    • 2 cups (240 g) confectioners’ sugar, sifted (plus more for topping)
    • 1 1/2 teaspoons vanilla extract

    Instructions:

    1. Preheat the oven to 350°F (°C). Line at least one cookie sheet with parchment paper – I alternated my two in the oven but in an ideal world I would have lined three.
    2. Whisk together the flour, cocoa powder, baking soda and salt.
    1. In either a large bowl using hand-held beaters or a stand mixer fitted with a paddle attachment, beat the butter for 1-2 minutes on medium-high speed until smooth and creamy. Add the brown sugar and beat on medium-high until fluffy and combined. Beat in egg replacer on high speed, scraping down the sides and bottom of the bowl as needed. Beat in the vanilla and “buttermilk”. If it looks curdled at this point don’t worry!
    2. Add food coloring! Feel free to use more or less; I used a little more because it didn’t feel green enough. If you have to use liquid food coloring be prepared to use the whole thing to get the right color.
    1. Slowly mix the dry ingredients into the wet ingredients until just combined. It will not be a cookie dough; it’ll be pretty sticky/wet but still scoopable
    2. If you have time, let the batter rest for 15 minutes or stick the batter in the fridge until you are ready to bake, tightly wrapped (Saran wrap pressed against the batter). I did this between batches in the oven because I had to take a break for Mathias’ therapy and it scooped better a little chilled.
    3. Scoop onto cookie sheet, leaving 2-3 inches between cookies. You should fit 8 cookies on the sheet comfortably. I use a cookie scoop and if you don’t have one, you should!
    4. Bake for 10-12 minutes; my oven took *just* 11 minutes.
    5. Let them cool completely before moving them!
    6. Make the frosting – combine cream cheese and butter together until whipped. Add powdered sugar (sifted if you want, but I didn’t bother) and vanilla.
    1. Match the cookies up based on their size – one thing I love about using a cookie scoop is that they tend to be pretty equal. Spread cream cheese filling onto the flat side of one cookie and sandwich with the other. Repeat with the rest. Sprinkle confectioners’ sugar over the top, if you want – it makes them prettier for pictures but messier to eat. Cover leftover whoopie pies and store in the refrigerator for up to 1 week, or individually wrap the filled cookies and place in a freezer safe bag and put in the freezer for long term storage; according to the original author they should keep for a few months in the freezer!

    Picking Out a Christmas Tree, and Making Traditions

    Adventures

    There are very few things that have been consistent traditions since Lucas and I got married. We always get a real tree, but that’s basically it. Our first two Christmases married we got a tree at a local market. Our last Christmas we moved on December 15th and Lucas was the only one in the shop at Lighthouse trying to finish tables before Christmas, and I had given birth to Liv only 2 months prior. So I got a tree by myself with the babies at an Ace Hardware and it was very depressing because I wanted Lucas to be there but the first year of running your own business means making sacrifices, in this case, having your wife get your tree without you.

    This year I had big plans: a farm, away from the city, on a beautiful early winter day, where we could cut down our own tree.

    As it happened, it rained all day, and we almost went to Home Depot instead. I’m glad we didn’t. The drive was gorgeous and we stopped to take a few pictures on the way.

    We went to Mistletoe Christmas Tree Farm in Stow, MA and unfortunately they already ran out of cut-your-own trees. Honestly we wouldn’t have done it anyway since it was so dang muddy and wet outside and Lucas refused to get his shoes dirty (not kidding).

    Fortunately, they had a barn full of perfect trees and it didn’t take long for us to find the right one to take home!

    Everyone who worked there was super nice and offered to take a few pictures of us, which I am as grateful for as the tree itself. Getting Lucas in a picture with me is so hard because he’s usually the photographer … but it’s not a family photo if the whole fam isn’t in it.

    Mathias had a blast but wanted to run the whole time. Hence his lack of enthusiasm for these photos.

    Raw enthusiasm pictured below:

    He did end up falling in the mud, but didn’t seem phased by it which is amazing considering how texture sensitive he is! I’m sure it helped that only his pants got ruined and he didn’t get anything on his face…but still.

    I had so many plans for how the day should have gone, and all the pictures I wanted to take, but the candidate that Lucas got are pretty amazing and I love them.

    Maybe next year we’ll get to cut down our own tree and there will be snow on the ground, and we’ll have a great tripod set-up and we can take family photos in the field instead of in front of the barn. Either way, it doesn’t really matter – what matters is that we got to spend time together in a beautiful place, starting to prepare for the most wonderful time of year. For that, I’m grateful.