
First of all, I’d like to thank the academy…
Actually I’d like to thank my extremely protective mother who refused to allow any dairy in our house for 8 years, and forced me to learn how to bake dairy free against my wishes. The first time I got to bake with real butter again was only after I got married.
My youngest brother is severely allergic to dairy (I’m talking, can’t walk into an italian restaurant without wheezing and getting a runny nose) and we had quite a few scares when he was a baby because anaphylactic reactions are life threatening. So we went dairy free. And at 13, I already had a passion for baking (I think I wanted to be a pastry chef around age 7 or 8) and it was like…the end of the world. But I learned, slowly, and good thing I did because both of my children have had dairy intolerances as infants and Liv still hasn’t outgrown hers.
A decade ago, vegan and dairy free recipes were not trendy or, honestly, available. I remember when Babycakes opened in NYC and my mom went there so excited because their desserts were allergy friendly and it was a safe place to buy something for my brother. But it was expensive. So that was a rare occurrence and instead we all learned that baking dairy free was not only possible, but could be just as good (or better) than desserts with dairy!
I’ve mentioned before how things have changed so much since then and how many more options we have, but I am so grateful that vegan food has entered mainstream culture. And because of my mom’s drive to protect my brother at all costs, I learned how to adapt recipes and for them to not be total failures (usually).
So! I made Red Velvet Whoopie Pies on Wednesday as part of our cookie challenge and they were very, very dairy filled. They tasted great – everything you would want from Red Velvet Cake, they were moist and rich and the cream cheese frosting was perfectly thick and a happy balance of not too sweet, not too tart. They didn’t rise as much as I would have liked and I brought that up to the other ladies in this challenge with me and they offered some suggestions.

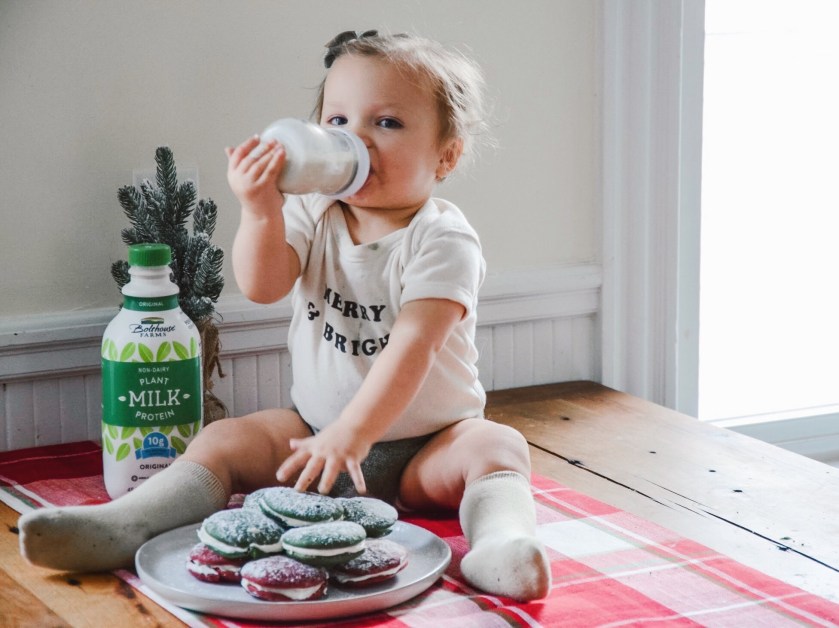
However, Livia has learned what cookies are during this time and was ~furious~ that I wouldn’t give her any. So I decided to adapt the recipe, not just to be dairy free but totally vegan, because why not go all in?

I was elated because these were even better than the original!
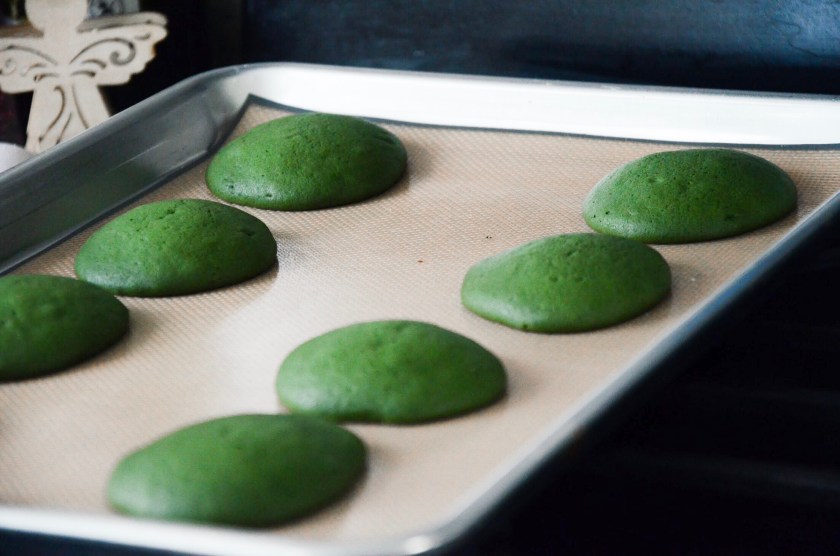
Look at that rise! 🙌🏼
I am always hesitant about substitutes and the original recipe called for buttermilk. When you want to make a vegan milk “buttermilk” you add 1 tsp of vinegar to 1 cup of alternative milk and let it sit for 5 minutes. This was my first time using Bolthouse Farms to make buttermilk and it worked out really well!
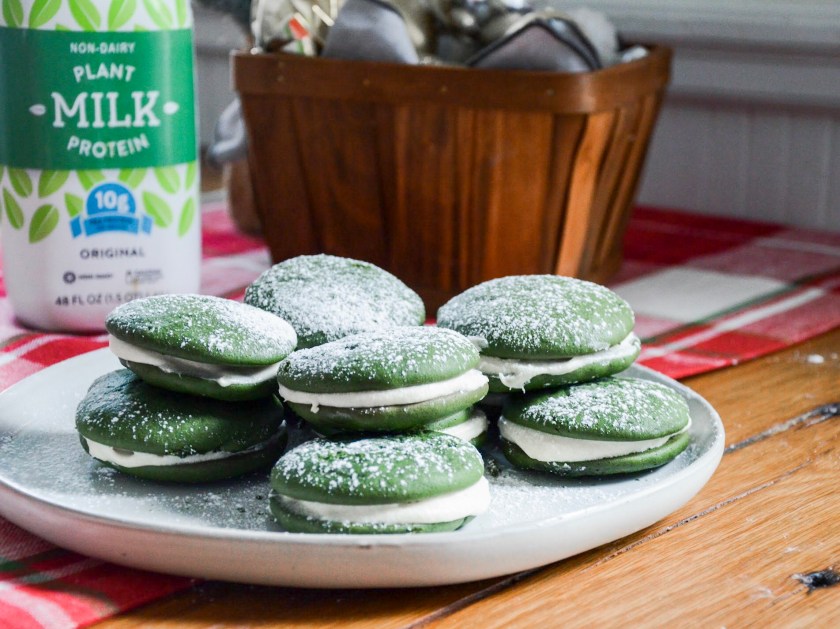
They are “velvet” whoopie pies and I went with green to distinguish them from the red non-vegan ones I made the day before. And in honor of Boston – I’m calling these Green Monstah Whoopie Pies.
If you know, you know.
Needless to say, Liv was a fan.

Green Monstah Whoopie Pies
Veganized / Adapted from Sally’s Baking Addiction.
Ingredients:
- 2 cups (250g) all-purpose flour (spoon & leveled)
- 3 Tablespoons (15g) unsweetened natural cocoa powder
- 1 teaspoon baking soda
- 1 teaspoon baking powder
- 1/2 teaspoon salt
- 1/2 cup (115g) unsalted vegan butter, softened to room temperature. I used Fleishmann’s.
- 1 cup (200g) packed light brown sugar
- 1 egg substitute – I used Namaste Raw Foods Egg Replacer but have no preference
- 2/3 cup (160ml) “buttermilk”, room temperature; mix 1 cup of bolthouse farms unsweetened plant milk with 1 tsp of apple cider or white vinegar. Let sit for 5 minutes and then measure 2/3 out. It will be clumpy – this is normal! *if you don’t want to use Bolthouse Farms, here are my suggestions: unsweetened almond milk or unsweetened coconut milk (not canned!). Other milk alternatives are usually too thin and will thin out your batter!
- 2 teaspoons pure vanilla extract
- ~ 1 tsp gel green food coloring, I used a little more
Cream Cheese Filling:
- 6 ounces (170g) vegan cream cheese substitute, softened to room temperature. I used Wayfare (it is coconut based) because I like their flavor best
- 1/4 cup (1/2 stick; 60g) unsalted vegan butter substitute, softened to room temperature
- 2 cups (240 g) confectioners’ sugar, sifted (plus more for topping)
- 1 1/2 teaspoons vanilla extract
Instructions:
- Preheat the oven to 350°F (°C). Line at least one cookie sheet with parchment paper – I alternated my two in the oven but in an ideal world I would have lined three.
- Whisk together the flour, cocoa powder, baking soda and salt.
- In either a large bowl using hand-held beaters or a stand mixer fitted with a paddle attachment, beat the butter for 1-2 minutes on medium-high speed until smooth and creamy. Add the brown sugar and beat on medium-high until fluffy and combined. Beat in egg replacer on high speed, scraping down the sides and bottom of the bowl as needed. Beat in the vanilla and “buttermilk”. If it looks curdled at this point don’t worry!
- Add food coloring! Feel free to use more or less; I used a little more because it didn’t feel green enough. If you have to use liquid food coloring be prepared to use the whole thing to get the right color.
- Slowly mix the dry ingredients into the wet ingredients until just combined. It will not be a cookie dough; it’ll be pretty sticky/wet but still scoopable
- If you have time, let the batter rest for 15 minutes or stick the batter in the fridge until you are ready to bake, tightly wrapped (Saran wrap pressed against the batter). I did this between batches in the oven because I had to take a break for Mathias’ therapy and it scooped better a little chilled.
- Scoop onto cookie sheet, leaving 2-3 inches between cookies. You should fit 8 cookies on the sheet comfortably. I use a cookie scoop and if you don’t have one, you should!
- Bake for 10-12 minutes; my oven took *just* 11 minutes.
- Let them cool completely before moving them!
- Make the frosting – combine cream cheese and butter together until whipped. Add powdered sugar (sifted if you want, but I didn’t bother) and vanilla.
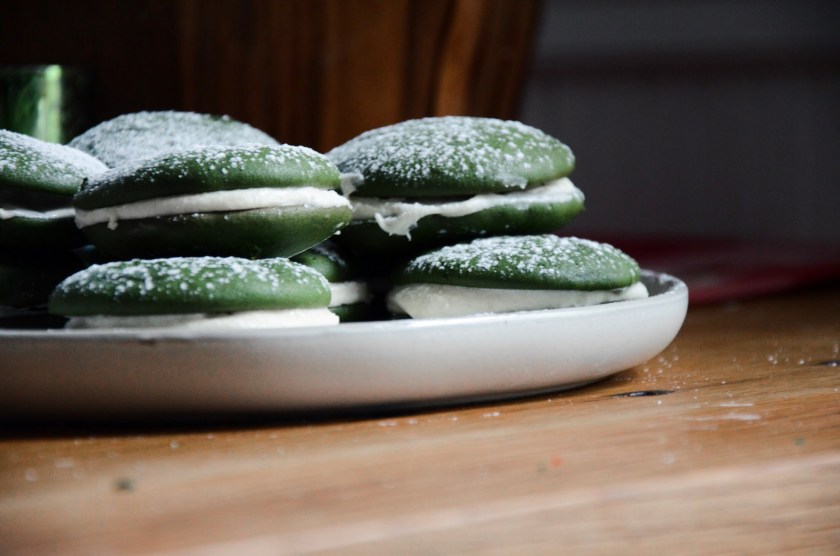
- Match the cookies up based on their size – one thing I love about using a cookie scoop is that they tend to be pretty equal. Spread cream cheese filling onto the flat side of one cookie and sandwich with the other. Repeat with the rest. Sprinkle confectioners’ sugar over the top, if you want – it makes them prettier for pictures but messier to eat. Cover leftover whoopie pies and store in the refrigerator for up to 1 week, or individually wrap the filled cookies and place in a freezer safe bag and put in the freezer for long term storage; according to the original author they should keep for a few months in the freezer!

One thought on “Vegan Green Monstah Whoopie Pies”